Food photography is both a satisfying—and frustrating—endeavor for many people. It should be easy. After all, the food doesn’t move, unlike people and animals, and yet it doesn’t automatically come across on camera the way you see it in front of you. It’s a challenge worth facing: Cooking is like doing the dishes or cleaning the house. No sooner have you done it than it’s gone and needs doing all over again. Taking pictures of food is a way to memorialize those gorgeous creations—or even just the simple, basic ones.
Our lives, in many ways, revolve around food. Food is comfort and family, tradition and memories—but we rarely photograph this key element in the course of daily living. It’s both immensely important and completely overlooked at the same time. Food photographs are also a great way to share food and to share recipes. If we’re going to try something new, we like to see a picture so we know how it’s supposed to turn out.
Here on Farm Bell Recipes, we have two ways for you to share photographs of food: When posting a recipe, add your photo before submitting the recipe. OR–you can add a photo later to your own recipe or someone else’s. Did you know you could do that? If you posted a recipe and didn’t have a pic, the next time you make that favorite recipe, you can go back and add your photo! Or if you’ve made someone else’s posted recipe, you can add your photo to that recipe’s gallery. How much fun is that?
Here is how you do it:
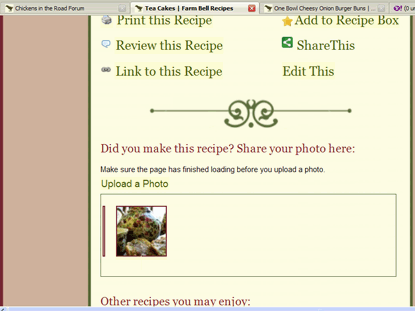
Scroll to the bottom of any recipe post and click on Upload.
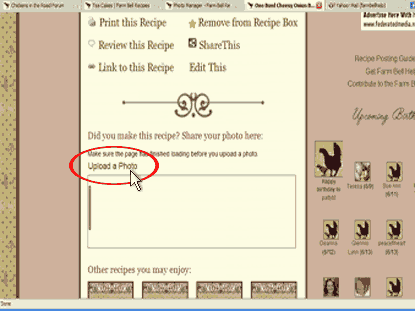
Browse your computer for your photo file.
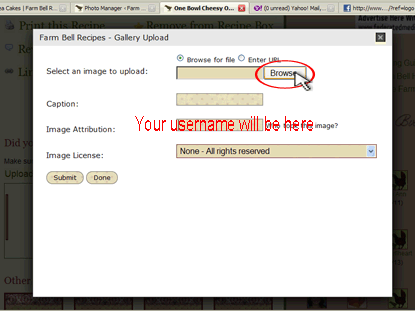
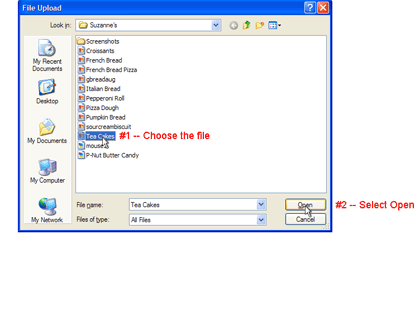
Choose your file.
Click to submit.
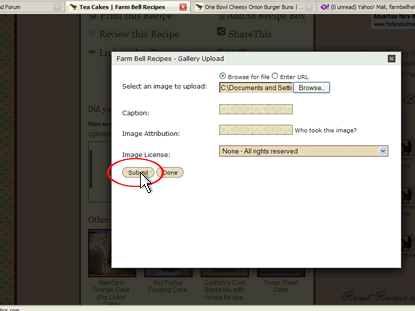
And you’re done.

There’s your photo!
Here are my Five Easy Steps to Great Food Photos:
1. NO FLASH. Please, please, please, whatever you do, don’t use flash! Flash kills food. (And just about anything else you want to photograph.) Take photos of food in natural light. If this means moving your food, then move it! Take it to a table near a window, or even outside. Use kitchen towels or tablecloths to disguise an unsightly surface if necessary. It’s best if you can take a photo during the day when the most natural light is available, but avoid strong, direct light that will put a harsh glare on your food. Indirect natural light is best.
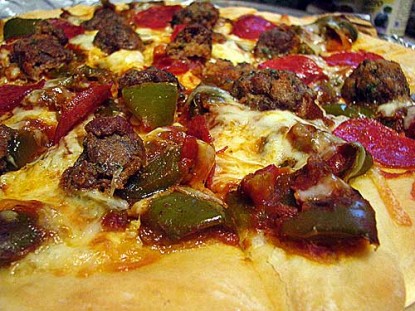
If you absolutely, positively must take photos at night, STILL DON’T USE FLASH. Turn on every light in the house to provide the most surrounding light possible.
This photo was taken at night in my kitchen, with no natural light, and NO FLASH. Meatball Pizza.
Most of the food photos on my blog are taken in natural light on my dining room table because the room is filled with windows. Find a great way to take natural light-filled photos and you will be amazed at the difference in your food photos!
2. Sharpen. Whatever type of camera and computer you use, these days the most basic digital cameras and computers can produce great food photos. Don’t be afraid of a little post-processing. Find the sharpening tool in your photo processing program and use it. Learn to play with light and contrast, too. You don’t have to be a professional photographer to master a few of the simple tricks. Just don’t be afraid to try! What do you have to lose?
3. Take a LOT of pictures! In the digital age, we don’t have to worry about wasting film. Give yourself plenty of choices when going through your photos. If you take a couple dozen pictures of a recipe, something’s bound to turn out. Take all sorts of different angles and views then take your pick for the best of the best.
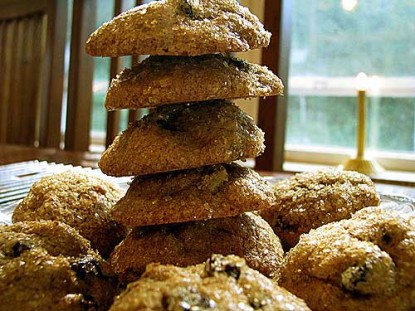
4. Play with your food! You don’t always have to take a straight-on centered photo. Take photos to the side of the food. Over the food. Stack the food, line up the food, put it in a basket, put it on a plate. Stick a fork or spoon in the food.
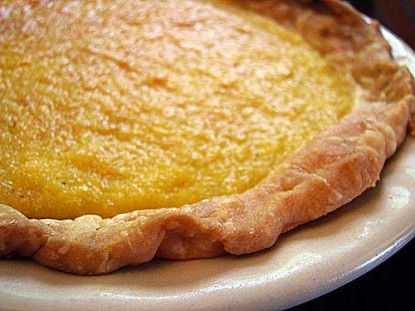
5. Get close to your food! We want to see it like we’re there and it’s right in front of us
Places to find inspiration for great food photography:
Foodgawker
Tastespotting
Now c’mon! Show us your photos!!
Note: Please size your photos down. If you try to upload a huge photo, the system can’t handle it. (The size of your photo when it comes off your camera is as big as a computer screen! That’s why you need to size it down before uploading.) The best size to upload is 500 x 375 pixels.




Carol Langille says:
I am inspired!!! Just wonder what I can round up in the fridge and pantry to begin this Food Photographing Odyssey!
I have made Suzanne’s recipe for Sour Cream Enchiladas about six times now and have never photographed once. Maybe it’s time….sounds like a good supper, too!
Thanks for the tips…I would have went about it all wrong by using a flash.
On June 10, 2010 at 5:54 am
Staci says:
I take pictures of almost everything I cook, make, or bake. My friends and family think that I am absolutely nuts because I continuously snap pics of plates of food. I have an entire jump drive dedicated to recipe pics.
I love your tips!
I have very little natural light and the lighting in the house is just down right awful (I don’t know who designed this place).
I use a macro setting a lot for food and often a child/pet setting for bubbling pots of sauce. Photoshop helps out a lot too.
On June 10, 2010 at 6:23 am
CindyP says:
Great post!
My SO always has a question look on his face when he walks in as I’m taking a pic of whatever is on the stove or the counter….. LOL!!!
A point and shoot takes great pics, too! Set it on the macro setting, get close, and you can get some great shots!
On June 10, 2010 at 7:05 am
lward says:
Thanks for the food photo tips. I love food, and photography! I have tried your recipes based on the photos you have taken. Mmmm good.
On June 10, 2010 at 8:34 am
Dede ~ wvhomecanner says:
Great tips! Needed help LOL.
I really do hope we see more pics from lots of folks!
On June 10, 2010 at 8:39 am
Dede ~ wvhomecanner says:
oh to specify, it is I who needed help!
On June 10, 2010 at 8:40 am
KentuckyFarmGirl says:
Love all those tips and I use them all! I also use my Macro setting on my camera (it’s the same one you have). I love the fact that the flash doesn’t just pop up on the Canon S5. On my new Nikon I have to fiddle with the flash to keep it from popping up when I go to take a photo. I also forget to remove my lens cap because the Canon popped it off for me LOL. I’m still in the learning mode.
On June 10, 2010 at 8:53 am
Jennifer says:
WHOA…. how did I miss Maple Rum Raisin Cookies!?!?!?!
just starting to learn/play with those settings too…just starting to take food pics – every time I post a recipe I feel bad I dont have a pic of what it is supposed to look like because I too like to see what the finished recipe looks like –
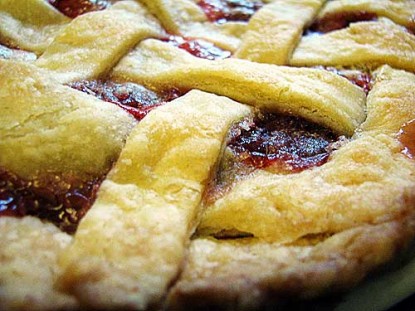
strawberry & cornmeal pies look sooo yummy!
LOVE foodgawker!!!!
On June 10, 2010 at 10:24 am
daiseymae says:
this is an excellent tutorial Suzanne. thank you very much. I submitted a recipe a few weeks back with no photo and I’m making that very recipe right now. Recipes with an accompanying photo are much nicer. Often if there isn’t a photo I move on to the next recipe, which is most likely cheating myself of some good eats!
On June 10, 2010 at 4:03 pm
rephiddy says:
How do you resize a photo?
Ran into that problem just the other day. I was trying to post a picture to a recipe from here I had made.
The angel in the guise of Cindy P came to my rescue and posted the picture for me.
Do you need a special program to resize with?
I am techno phobic so please explain slowly and enunciate well for me. 😉
Thanks.
Phyllis
On June 12, 2010 at 7:33 am
Nerosmom says:
I take too many pictures of food and post to my Facebook. My friends think all I do is cook and eat….hmmmm might be true! Seriously I have gained maybe 10 pounds since I joined this blog!!
On June 12, 2010 at 11:09 pm
CindyP says:
Rephiddy, you can resize a pic through paint, photoshop or some of the digital cameras come with software that does it, too. There is an online resizing site http://www.shrinkpictures.com/ that you can use and use 500 in the custom field. You download it back to your computer and delete it online (or they delete it after 2 hours I believe it is).
Hope this helps!!!
On June 13, 2010 at 12:12 pm
glenda says:
Suzanne, thanks for this post about adding a picture later! I missed getting my photo of the Hot Milk Sponge Cake on and added it this morning. It went quite easily.
I have taken so many pictures of my food and cooking that now my husband says ‘you should take a picture of this’ when I do something he likes.
On June 14, 2010 at 7:46 am
sheri blanchard says:
These tips are much appreciated! My camera is certainly closer to the point-and-shoot, so I’ll probably never get really great shots (unless by accident!), but I will keep trying, with these guidelines the photos can only get better. Looking forward to the retreat too!
Sheri
http://www.BringMeMyCoffee.com
On May 23, 2012 at 10:45 pm