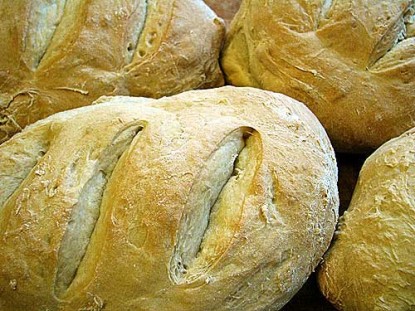
My twist on this popular trend, with Grandmother Bread.
Difficulty: Easy
Servings: varies
Prep Time: 5 minutes a day--after the first time Cook Time: variesIngredients
4 cups warm water
1 tablespoon yeast (1 packet)
1 teaspoon salt
1/4 cup sugar
7 cups all-purpose flour
Directions
This is a Grandmother Bread recipe.
Use a very large bowl! (You might even use a big pot.)
In a large bowl, combine water, yeast, sugar, and salt. Let sit five minutes. Stir in first three cups of flour with a heavy spoon. Mix in the rest of the flour, with the spoon, a cup or two at a time. Cover loosely. Let the dough rest for two hours at room temperature. It will rise, and slightly collapse.
Place the bowl of dough in the refrigerator at least three hours or overnight. (Or as long as you want! You can let this dough sit in your refrigerator for weeks.) Cover tightly now, or cover with a lid if you made the dough in a big pot. (Don’t transfer the dough at this point–make it in whatever you intend to keep it in.) The dough will be easier to work with (less sticky) if you refrigerate at least overnight before using the first time.
When you’re ready to bake some bread, take out the bowl or pot and sprinkle a little flour on top of the dough. DO NOT PUNCH THE DOUGH DOWN. Using a spoon, cut away the portion of dough you want–half, a third, a fourth, depending on what type and size of loaf you want to make.
You can take one portion at a time and put the bowl with the rest of the dough back in the fridge for another day, or use it all to make several loaves at once. Remember that if you want to continue this process to develop a sourdough flavor, leave about a cup of dough in the bowl and remake the recipe.
With floured hands, shape dough into loaves. DO NOT KNEAD. Just shape. Grasp the dough in both hands, pulling it out and tucking edges under as you shape. You can make round loaves, long French- or Italian-style loaves, or (if using half of the dough) place it in a loaf pan. Lightly grease whatever pan you’re using and let the shaped dough rest for at least 30 minutes and no longer than 90. The dough won’t rise much during this time (the dough is cold) and that’s all right–it will rise in the oven. (Time the rest period to suit yourself and your schedule that day. Don’t go over 90 minutes because the dough will get too warm, flatten out, and free-form loaves will lose their shape before baking.)
Your bake time will vary depending on the size and type of loaf, anywhere from 30 to 45 minutes. (Keep an eye on it!) Bake in a preheated 350-degree oven.
Categories: Breads, Yeast Breads
Submitted by: suzanne-mcminn on April 6, 2011


Michelle says:
Suzanne, I love this website. Just joined today, but have browsed it before. Not sure how to contact you so I am doing it this way. Used your biscuit mix, way better than Bisquick. My dinner biscuits seemed to be fluffier for some reason when I used yours. A keeper. Now I have a bread baking question. I am getting into baking breads. Kneading by hand is sometimes hard because I have arthritis/carp. in my right hand. I am a hairstylist, for 30 years, and my hands are paying the price. I won’t let it stop me. What is the next best, kneading in a kitchen-aid or bread machine on dough only? I can do light kneading, but 10 min. starts to hurt.
On April 17, 2011 at 2:49 pm
Suzanne McMinn says:
Michelle, you can make Grandmother Bread with a KitchenAid. I have tried that. As for kneading, I never knead for 10 minutes! I probably knead bread for about 3 minutes!
On April 17, 2011 at 3:04 pm
mymukki says:
Hi Suzanne, I love this recipe! Yesterday I made 3 perfect baguettes, crispy crust with soft moist interiors with the crumb to die for! Big and little holes everywhere, I was so thrilled. I decided to slice the bread and dry toast it in the oven for bruschetta toasts… BIG MISTAKE! After an hour in the oven at 300º I tossed with fresh rosemary, garlic and kosher salt… then I tried to take a bite and almost broke my teeth LOL
But, my siberians love it! http://youtu.be/TF5_gNzKj0M
On April 10, 2012 at 10:00 am