My experiences with candy have not been exactly successful.
Entertaining, yes. (See How NOT to Make Horehound Candy.)
Successful, no.
So, it’s been a while since I’ve done the candy thing.
Even so, I’ve been thinking about making candied ginger for a long time. And now is the time.
Yep.
Any minute now.
Excuse me while I steel my nerve.
OK. I’m ready. I’ll be back when I’m done.
People. This was sooooo much easier than I thought. Seriously.
The first thing I did was a bit of recipe research. One set of recipes sliced the ginger very, very thinly and did only one boil, then dried it for a few hours and coated with sugar. The other group sliced the ginger thinly and did two boils, with the final one going until all the liquid was completely evaporated.
I tried the first method first because it seemed easier but the ginger stayed tough and very VERY hot. Also, not sweet enough.
Crystallized ginger should be seriously sweet. Really, what’s the point if it’s not seriously sweet?
So, I tried the second method. We have a winner!
Here is what you do:
1. Buy fresh ginger. The roots should be firm.
2. Peel the ginger. I saw on Cooks Illustrated that it’s easier if you use the side of a spoon to scrape the peel and it worked like a charm.
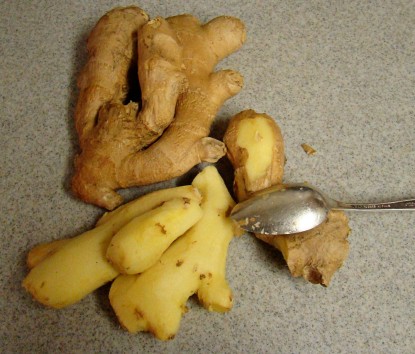
3. Chop the ginger–in chunks or slices, whatever you want. You do not have to slice it paper-thin like some recipes say. I did chunks. I like chunks. Chunks are great.
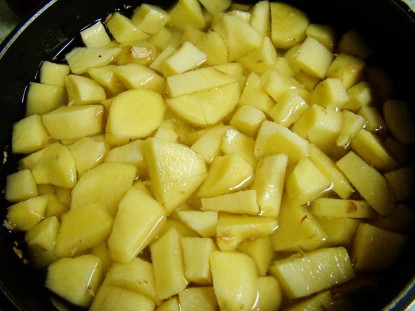
4. Put the ginger in a saucepan. Measure the water you put in. Put in enough water to cover the ginger.
5. Put an equal amount of sugar in the pan – that’s why you needed to measure the water you put in.
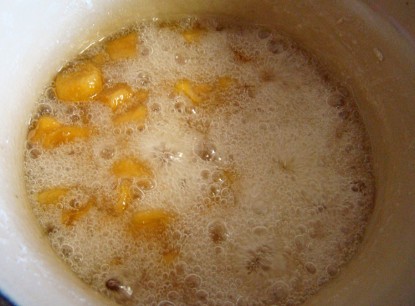
6. Boil for 45 minutes or so. The ginger will shrink some and turn golden in the center as it cooks.
7. Drain the syrup off the ginger. Save the syrup! It’s very hot, but great for fruit salads, homemade ginger ale, or drizzled over grapefruit and broiled. Plus you need a bit of the syrup for the next step.
The first set of recipes I studied stopped here. Dry the ginger for several hours or overnight. Make sure the pieces aren’t touching as they dry. Toss with sugar. But really, don’t stop here! Keep going!
8. Measure the ginger as you put it back in the saucepan (or another smaller one).
9. Put an equal amount of sugar in the pan and 2 tablespoons of syrup for every cup of ginger.
The sugar and ginger will look damp, but not at all wet. You might think it looks too dry. That’s okay. As soon as things heat up again, the ginger will release more liquid and it will get wetter. If you think you need more liquid, add a bit more. It won’t hurt and it will make you feel better, which is important when you’re making candy. I know.
10. Put the pan on medium heat and let it come to a boil. You can turn the heat down a bit if you want to, but you want to keep a good boil. Stir OFTEN. Keep an eye on this. As it boils way down, you’ll want to stir constantly so that it doesn’t start to burn.
11. Boil until all of the liquid boils out and the sugar separates and gets dry. Stir constantly at the end!
12. As soon as it gets dry, take it off the heat.
13. Put paper under a cooling rack. I used the shelves from my dehydrator. Worked like a charm.
14. Spread the ginger out on the rack to cool and let the sugar fall through onto the paper. Keep the sugar!
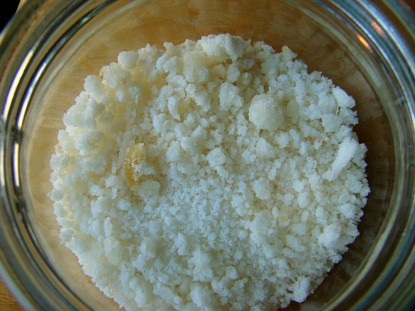
15. It’ll cool pretty fast. Taste it.
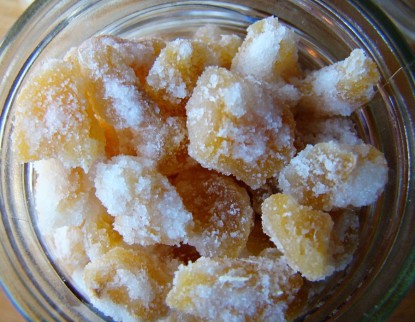
Good, huh!
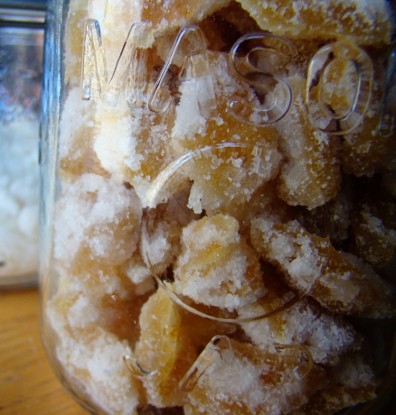
Keep your ginger and sugar in jars, away from humidity.
Get the printable and save it to your recipe box:
Candied Ginger
Robin from Rurification blogs at Rurification.
Do you have a recipe post or kitchen-related story to share on the Farm Bell blog?
See Farm Bell Blog Submissions for information, the latest blog contributor giveaway, and to submit a post.
Want to subscribe to the Farm Bell blog? Go here.


bonita says:
Robin, thanks, I’m certainly going to try this. I’m a ginger freak. I’ll make some of the ginger in nice thin strips… then for step 15, I’ll dip the strips halfway into some melted chocolate.
On March 1, 2012 at 1:59 am
prvrbs31gal says:
I attempted this for the first time this winter and have to say that the homemade ginger ale is the best. However, the syrup is also good to mix with lemon juice and honey for coughs. And the kids like it better than the bad-tasting commercial stuff that doesn’t work, anyway.
On March 1, 2012 at 7:33 am
murphala says:
Doing candied ginger was tickling my fancy and my sweet tooth…thanks for posting this! I will try it with the next gnarled root I buy! 🙂 And it’s a fabulous idea to make home-made ginger ale from the syrup. I have soda stream soda maker so that’s perfect. 🙂
On March 1, 2012 at 12:54 pm
Darlene in North GA says:
3 days ago, I bought some ginger root to do this very thing! I was going to go online and find a recipe to make it. You’ve saved my day. Thanks!
How does one go about making gingerale out of the syrup? (Now if I could figure out how to make Reed’s Extra Ginger Ginger Beer (soda), I’d be in HOG HEAVEN.
On March 1, 2012 at 7:15 pm
Robin from Rurification says:
Hi Darlene! To make ginger ale, I just add plain fizzy soda water to my ginger syrup. If you’ve got a soda stream, then add plain water and give it a few pumps with the machine.
On March 1, 2012 at 7:33 pm
Darlene in North GA says:
Thanks, Robin!
On March 2, 2012 at 5:47 am
Beecie says:
I ran out of storebought candied ginger last week….and have been dreading having to reinvest. This is so perfect! I’m totally trying this as soon as I get to the store.
Thanks for blazing the trail!
On March 2, 2012 at 6:47 am
Joy says:
When I was in Hawaii I bought some candied ginger with the hot taste and rather tough texture like your first recipe. I like hot stuff and thought it was great. Not so sweet. I’m told it is often used in oriental cooking this way and am looking for recipes. Glad I don’t have to go all that way but can make my own–whichever kind I decide to make. Ginger syrup sounds interesting. Hummm.
On March 3, 2012 at 1:20 am
Darlene in North GA says:
Just made 2 “palms” of raw ginger’s worth of this stuff. I can NOT tell you how GREAT this stuff is. Not only that, but now I have both ginger sugar AND ginger syrup “free” from making this.
Only thing I did differently was that I had to add another 1 TBS of liquid in the second step. After about 5 minutes on med. my sugar wasn’t “melting”. That did the trick and the sugar then liquified. It may be that because I didn’t get the FIRST step boiling HARD and then turned it down too low that I extracted more liquid from the ginger than if I had had the correct ROILING BOIL. And THEN turned it down, but kept the rather hard boil instead of a gentle simmer. But it still turned out GREAT!!!
On March 14, 2012 at 2:10 am
Beecie says:
I’ve meant to do this for ages, and finally got around to it. Thank you SOOOO much for all your work and research, this was so simple. And as always, the homemade product is so far superior to the store bought variety as to make you wonder how you survived without it. AND my husband is going to take the syrup for his ginger beer. AND I’m going to use the sugar in my gingerbread pancakes and ginger/pumpkin muffins. So NOTHING goes to waste. Love it!!
On May 20, 2012 at 5:46 pm
Razzintaz says:
I tried this. The spoon thing is amazing!!
Do not walk over to your sink to get a drink! Keep a very close eye on this. I was almost done with the first cooking, and I needed a drink. Tin the 30 seconds I was gone it went real fast and burned. All of it … I am going to try this again. I know I can do it, and with how much candied ginger my daughter and I eat… I would rather make it myself… I also need to figure out how to grow it myself…
I will try again next week when I am able to get to the grocery again.
On January 7, 2014 at 3:33 pm