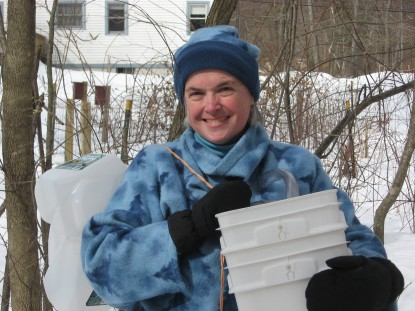
Here in New England, March is called Mud Season, but it is also Sugarin’ Season. Although commercial operations require a significant investment of time and money, making maple syrup for your own use is simple and relatively inexpensive. We began with a $90 investment and average between 2.5 and 3 gallons per year. You could get by with spending even less money and have an even higher yield, depending on your time availability, scavenging skills, ambition and desire. All you need are maple trees, a few simple pieces of equipment, wood to burn, and time.
You can make maple syrup from any kind of maple tree, Sugar, Red or Silver. The trees must be at least 10 inches in diameter and preferably get at least a half day of sunlight on them to get the sap running.
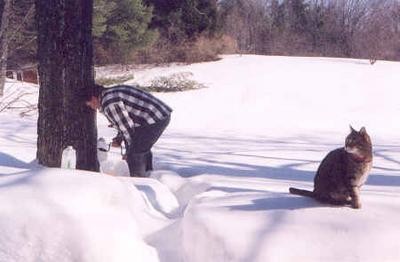
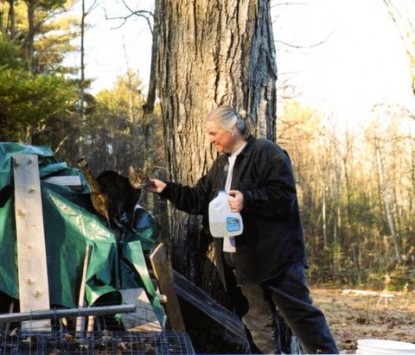
Guard cat is optional but is a nice addition!
Once you have decided which trees, you drill them with a special bit and insert the taps.
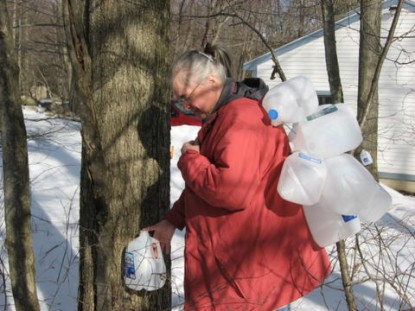
There are lots of options for collecting your sap but we use one-gallon water jugs as we get them free, they have a top, and it is good recycling.
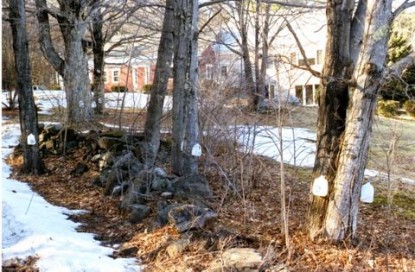
Our “Sugarbush”
We have a very primitive homemade evaporator, just a box made of fire bricks, open at one end and at the top, two blocks high, about 2 by 3 feet wide, with a galvanized steel stove pipe on the back to divert the smoke. . This size was determined by the size of the grate we scavenged from our barn. On top of the grate are two stainless steel restaurant pans, 4 inches deep, the kind you see in cafeteria steam lines, but you can use any container that will withstand the prolonged heat and is preferably more wide than it is deep.
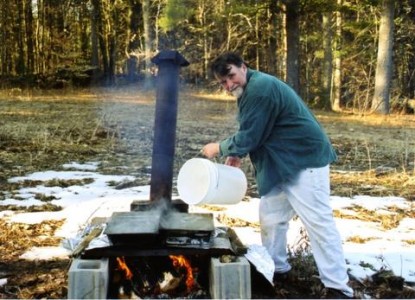
You need to work outside as you need about 32-40 gallons of sap to make one gallon of syrup and if you try to boil it in your house, you would end up steaming off your wallpaper or have the worst mold problem you have ever seen. Just start your fire, pour the sap into the pans, and let it boil away. It will take several hours and you will need to pay attention, but we have found that with two of us taking turns monitoring works well.
As the water boils off, the sap will turn darker and thicker, but not very thick. Using a thermometer at this point is a good idea. A candy or fat thermometer works best. You need something that goes to at least 220 degrees F. I use a digital candy thermometer, which works wonderfully, but a regular one works just fine. As your sap reaches around 200 degrees, you can move everything inside to finish it up. We find it is easier and more comfortable to control the last steps inside on the stove.
At this point we start to filter. We find that coffee filters work for us. Put the sap in a big stock pot and continue boiling. Keep the thermometer in the sap and keep an eye on it. You want to boil until it has reached 218 degrees F. The final step is to filter it one more time, pour into sterilized jars, and process in a hot water bath for 15 minutes.
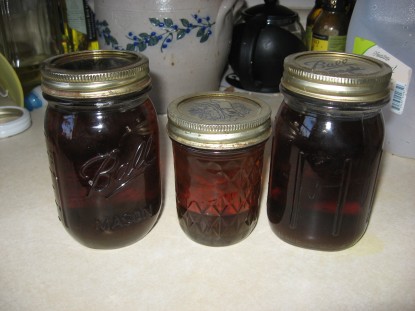
If this sounds like a lot of work…well, it is, on the days that you actually do the boiling. But it is only a short season and here in rural New England, there isn’t a lot else to do in March. We only boil on weekends and in three weekends we put up anywhere between 2 and 4 gallons of syrup, which is more than enough for our own use through the year plus great Christmas gifts. Happy Sugaring and make up some pancakes! Oh… and include your cats, they love to help.
Do you have a recipe post or kitchen-related story to share on the Farm Bell blog?
Go here to read information and submit a post to the Farm Bell blog.
Want to subscribe to the Farm Bell blog? Go here.


CindyP says:
Bunnyruth, I love this! You make it sound so, so easy. It probably is easier than I am imagining 🙂
Wonderful post, thank you!
On March 9, 2011 at 7:29 am
Sheryl - Runningtrails says:
Great post! I have always wanted to try this! You do make it sound easy and like something that I could manage.
On March 9, 2011 at 7:38 am
brookdale says:
Thank you so much for posting this!It takes me back to the days when my father would make maple syrup to sell.
We kids would help him gather the sap, and sometimes watch the fire. He had a little shack “sap house” where there were the most wonderful smells you could imagine.
When the syrup was finished we would run into the house to get our little tin cups, and a biscuit to put in the bottom, then Daddy would fill up the cup with warm syrup. Yum!
How I miss those days. Lots of hard work but lots of fun too.
On March 9, 2011 at 7:52 am
Larissa says:
What great pictures and story! It makes almost makes me want to move to places where it snows. Almost 😉
Seriously though, thank you for the post. It is cool to see those older traditions still being carried on by my CiTR peeps!
On March 9, 2011 at 8:13 am
Pete says:
What a lovely peek into the world of sugaring. Thank you so much for sharing with us. Takes just a bit of the mystery of it all away, but WOW – what a process it is!
On March 9, 2011 at 8:57 am
Teresa says:
So interesting, thank you for the post & pics. In central PA there are Maple Sugar Fests coming up this month – think we’ll just have to check some out!
Thanks again.
On March 9, 2011 at 9:41 am
Astrid says:
What a wonderful post, I have snow, cold, frost, lots of sun…everything..EXCEPT maple trees.
Now I want maple trees.
On March 9, 2011 at 11:03 am
Sherie says:
Thank you, bunnyruth, for this very informative and interesting post! I had always wondered how that wonderful syrup was made and NOW I understand why it is so expensive! What a job . . . I’m not a cold or snow person, so I guess I’ll just have to pay the price for the lovely maple syrup. I wish I loved the cold, though, and had maple trees – I would try it!
On March 9, 2011 at 11:03 am
Jennifer says:
WOW! I was wondering how to do this on a small scale since I saw everyone tapping their trees during the warm spell a could weeks back….
SSSSSHHHHH…..dont tell, but when I was little (pre-teen) my grandmother and I used to go driving on the back roads up in Jaffrey and “steal” glassfuls of the fresh sap in the buckets to drink!
Very Sweet (no pun intended) childhood memory!
On March 9, 2011 at 1:22 pm
edgewaterfarm says:
Hello Bunnyruth! Just love your article! Maple sap is flowing nicely here in SW Michigan. This is our 2nd year of making maple syrup and use a very similar setup to yours. (minus the guard cat. We have a “farm” poodle.) There is SO much work involved…it’s a good thing the reward is so SWEET! Thanks for sharing…
Brenda
On March 9, 2011 at 4:34 pm
su says:
LOL I should have KNOWN you’d belong here, too!
I loved your post and photos, too!!
On March 9, 2011 at 4:42 pm
Granma2girls says:
Thank you, as well, for sharing how to go about maple sugaring. I have a 200 yr. old maple in the backyard and was just thinking about whether it would yield any sap and how do you go about tapping,boiling,etc. And would one big tree like this yield enough to make it worthwhile? What do you think?
On March 9, 2011 at 5:36 pm
bunnyruth says:
Granma2girls… it is hard to say if it would be worth it. How big is the tree? For every 10 inches of diameter you can put in a tap, so if it is really wide you can put in two taps. Now, depending on the amount of sun it gets and how much you want to make will determine if it is worthwhile. We run 10 taps and here in New Hampshire, over generally a three week period will get 3-3 gallons. For us it is worth it. If your tree can handle two taps and is a good producer, and the weather conditions persist long enough (you need below freeing temps at night and above freezing temps during he day for sap to run), you might be able to make a half gallon of syrup. There are lots of variables. But it might be a fun thing to do with the kids.
On March 9, 2011 at 5:50 pm
bunnyruth says:
Hi Su… I din’t know you belonged here either! Su and I knew each other years ago when we both lived in Massachusetts. Nice to “see” you!
On March 9, 2011 at 5:53 pm
KimM says:
Thank you for this! You do make it sound easy, this has been on my list of things to try for years. I think I’m too late to start for this year, but I am going to save this for next year. Great info!
On March 9, 2011 at 6:44 pm
BeverlyC says:
This brought back a memory :)…. in 77-78, when I was in the 3rd grade, we lived in CT. My teacher brought a small amount of sap from VT & we processed it in class. I remember, at first, it stunk like all-get-out! But when it was finished, how sweet it was! Thanks for sharing!
On March 9, 2011 at 10:36 pm
bunnyruth says:
My article was intended to just be an introduction. If you would like more detail on this topic, please feel free to write to me directly. I would also recommend the book, “Backyard Sugarin” by Rick Mann and Daniel Wolf. The $9.00 we spent on this book right at the beginning were our best investment.
On March 10, 2011 at 10:08 pm
Jeannie Brazell says:
Wow, I won’t complain about the price when I treat myself to a small bottle of maple syrup. I did not realise how much sap it takes for a gallon. Thanks for the information.
On March 14, 2011 at 11:34 am