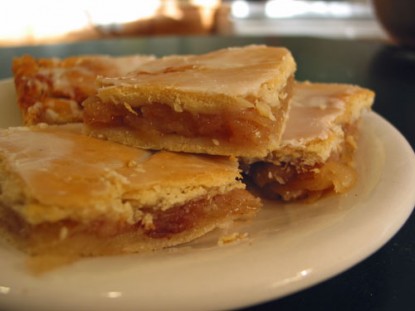
Apple slices are not pie, even though I put them in the pie category. They are a thinner, richer, more delectable dessert, glazed with icing and using a rich egg dough.
Difficulty: Intermediate
Servings: 48 apple slices (2X2)
Prep Time: 45 minutes Cook Time: 40 minutesIngredients
4 cups all-purpose flour
1 teaspoon salt
1 1/3 cup shortening (the original yellowed recipe calls for lard, so if you’re into being authentic…)
4 egg yolks
2 tablespoons lemon juice
1/2 cup water to start + 1/4 cup more if necessary
about 10-12 cups cored, peeled, sliced apples (slice them about 1/2 inch thick)
2 cups sugar
4 tablespoons flour
1 teaspoon ground cinnamon
Glaze:
1 cup confectioners sugar
2 tablespoons butter
1/2 teaspoon vanilla
2 tablespoons milk
Directions
Preheat oven to 400° F.
This recipe makes a big half-sheet pan full (18 x 13) or can be halved to fit a regular 9 x 13 pan.
Core, peel, and slice apples to about 1/4-1/2 inch thickness. I used the food processor slice blade to get these done, and they ended up about 1/4 inch thick. Perfect for getting them to cook through. Combine sugar, 4 tablespoons flour, cinnamon and mix with the apples to coat them. Set aside.
Combine flour, salt and shortening (or lard) and cut the shortening into the flour mixture until course crumbs are formed. Beat lemon juice, egg yolks and water together and pour over flour mixture. Stir to mix, until combined.
Divide dough in half, with one half being slightly larger than the other. Roll out dough to fit the pan size. Don’t roll it out like pie crust. Roll or pat it into shape right in the pan! Spread sliced apples evenly over the dough. Sprinkle with any remaining sugar/cinnamon/flour mixture that might remain in the bowl.
Roll out the other half of the dough to fit the top. A trick: Since this dough is so hard to handle, I took another half sheet (same size) and rolled the top out on the bottom of the second pan. Make sure the pan is heavily floured. Roll it to size and flip it over to cover the top. Pinch the edges to seal and prick the top randomly with a fork or slash with a knife to allow steam to escape.
Bake in 400° oven for 40 minutes until crust is brown and apples are tender. If you notice the crust becoming too brown too quickly, cover the top loosely with foil and continue baking. Remove and place the pan on a rack to cool completely.
Glaze: Combine milk, confectioners sugar, butter and vanilla. When the slices are cool, spread the glaze over it. Allow to harden. Note: This is the recipe for glaze for a smaller version, but this amount spreads nicely over the entire pan of slices. Do more if you like thick glaze. I don’t.
Alternative: Sprinkle with confectioners sugar while still warm.
Slice into 2″ x 2″ squares, or as big as you want ’em. Or as small as you want ’em. Feel free to enjoy a large apple slice with a scoop of vanilla ice cream, or grab one as you run out the door because they’re really portable!
If you wait at least two, if not three days to bite into one, the crusts begin to soften. Never soggy, just tender. The top crust is crispy-ish right out of the oven, but waiting awhile makes it delectable and soft through and through. You’ll see. Eat one now, and then wait. If you can.
Categories: Appetizers & Snacks, Cookies & Bars, Fruits, Kid-Friendly, Old-Fashioned, Other Desserts, Pastries, Pies
Submitted by: murphala on February 24, 2012


susankeaton says:
I am definitely making this come first apple harvest and many times thereafter!!!
On February 24, 2012 at 5:34 pm
daiseymae says:
oh my word. if only you knew how many hours I’ve spent surfing the web looking for a recipe for this. Hallelujah! thank you thank you thank you. I love this dessert. It’s always served at apple orchards in the fall, and I can never get enough.
this is going in my recipe box pronto!
On February 29, 2012 at 4:25 pm