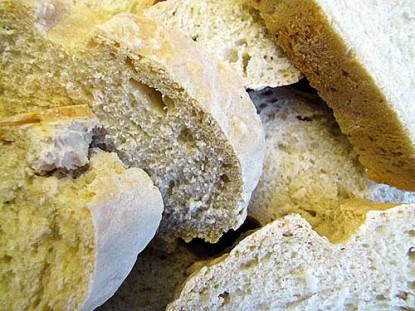
You’ll think you got it from an artisan bakery!
Difficulty: Easy
Servings: one loaf
Prep Time: several hours Cook Time: 30-45 minutesIngredients
Directions
*You can use any flour, or combination of flours, you wish, but if you’re using whole grains, be sure to add dough enhancer. (Find my homemade dough enhancer here.) Gluten contributes to a crispy crust. Other factors that aid in creating a crispy crust include high heat and steam.
To make a sponge, place the cup of warm water in a large bowl. Add the yeast. Let sit about 5 minutes then mix in one cup of the flour and 1/2 teaspoon of the salt.
Let the sponge sit and spongify. (I made that word up. I think.) You can let it sit anywhere from two hours to overnight. Since I’m impatient, two hours is usually all I can stand unless I’ve really planned ahead and it’s not almost dinnertime. The longer you let it sit, the more flavor you’ll get out of it. Find a warm place. Near the wood stove is good if it’s winter. (NOT ON TOP OF IT. That’s TOO hot and you’ll kill it.)
When you’re ready to go on with the bread, stir in the remaining salt and gradually add flour until the dough is stiff enough to knead. Knead dough until smooth and elastic–-a few minutes. Place dough in a greased bowl; cover. Let rise until doubled.
Shape the dough into a long, thin baguette and place on a baking stone. (Dust baking stone with cornmeal first if desired. No need to grease it.) Let rise 30-40 minutes. Preheat the oven to 450-degrees and heat a small pot of water. If desired, slash the top of the loaf with a sharp, greased knife. Brush the top of the loaf with water (NOT egg white and water, just water) and place it in the oven along with the pot of hot water for 10 minutes at 450.
Turn the oven down to 375-degrees and remove the pot of water. Continue baking for another 20-25 minutes or until done. Let cool 15 minutes on a wire rack before slicing it with a bread knife, not an electric knife. This crust is so deliciously crisp, it will make a crunchy sound when you cut into it. Inside that crisp crust, it’s tender-chewy with a light sourdough flavor.
P.S. For storage (what? you have leftovers?) do not seal it up air-tight. It’s best stored in a paper bag, like a brown lunch sack, to preserve the crustiness.
Categories: Breads, Old-Fashioned, Yeast Breads
Submitted by: suzanne-mcminn on January 13, 2011


Ross says:
Bagets are a required loaf in artisan baking contests. They require some experience to make them perfect but this recipe will assure a good start on a successful loaf. After making a few loaves at different times you will get the feel for the dough that makes it perfect.
Good recipe and method.
On January 13, 2011 at 12:42 pm